Tutorials

Sunday 19 July 2015

Oyster Stamps Open Day.....

Hi

Well I have been saving my cards up as I had made them for Oysters Stamps Open Day and Oh My did we have a super Day..... It all started very early today for me 5.00 am as I have to get up to get all my Dogs & Cats their scoff and walks etc.... Then I hurried myself into the shower all to get out by 7.00 am as I have a hour and a half's journey to get there through London which can be so stressful driving through the traffic.... But lucky for me my Husband Steve drove and to avoid the traffic we took the M25 and we could see the rain lifting as we got closer and once we arrived there the sun shone and buy did we have a great day.....

Anyway I have spent many a hour this week sitting painting and cutting all ready for me to decoupage and I think if I must say so myself I think I have done not too bad a job with these....

For the Fuchsia's I used Heartfelt Creations Fuchsia Stamps and also the Poppy Stamps are Heartfelt too..... I know you have seen Charlie before but I love him so much I just needed to do him again and I used in the background the Stampers Anonymous Stamp called CityScapes.....

I have used a variety of mediums to paint with Gelato's which are rich and creamy, Distress Inks which I adore and then the Spectrum Noir Aquamarkers which I too love very much.....

Anyway here are my samples and I just hope you like them .....

My first Card uses the beautiful stunning Heartfelt Creations Stamp Fuchsia Bouquet and also the Designs by Ryn Stencil Gingko Leaf.....


For this one I used the Heartfelt Creations Poppy Stamp called "Poppy Stem" and also again the Designs By Ryn stencil called Anemone.....I just love this card..... I don't know what it is but I really do so will have to re do this again sometime for me to keep .....


Penny Black's "Charlie" stamp is just one of my all time favourites and again I have just had to do him.....


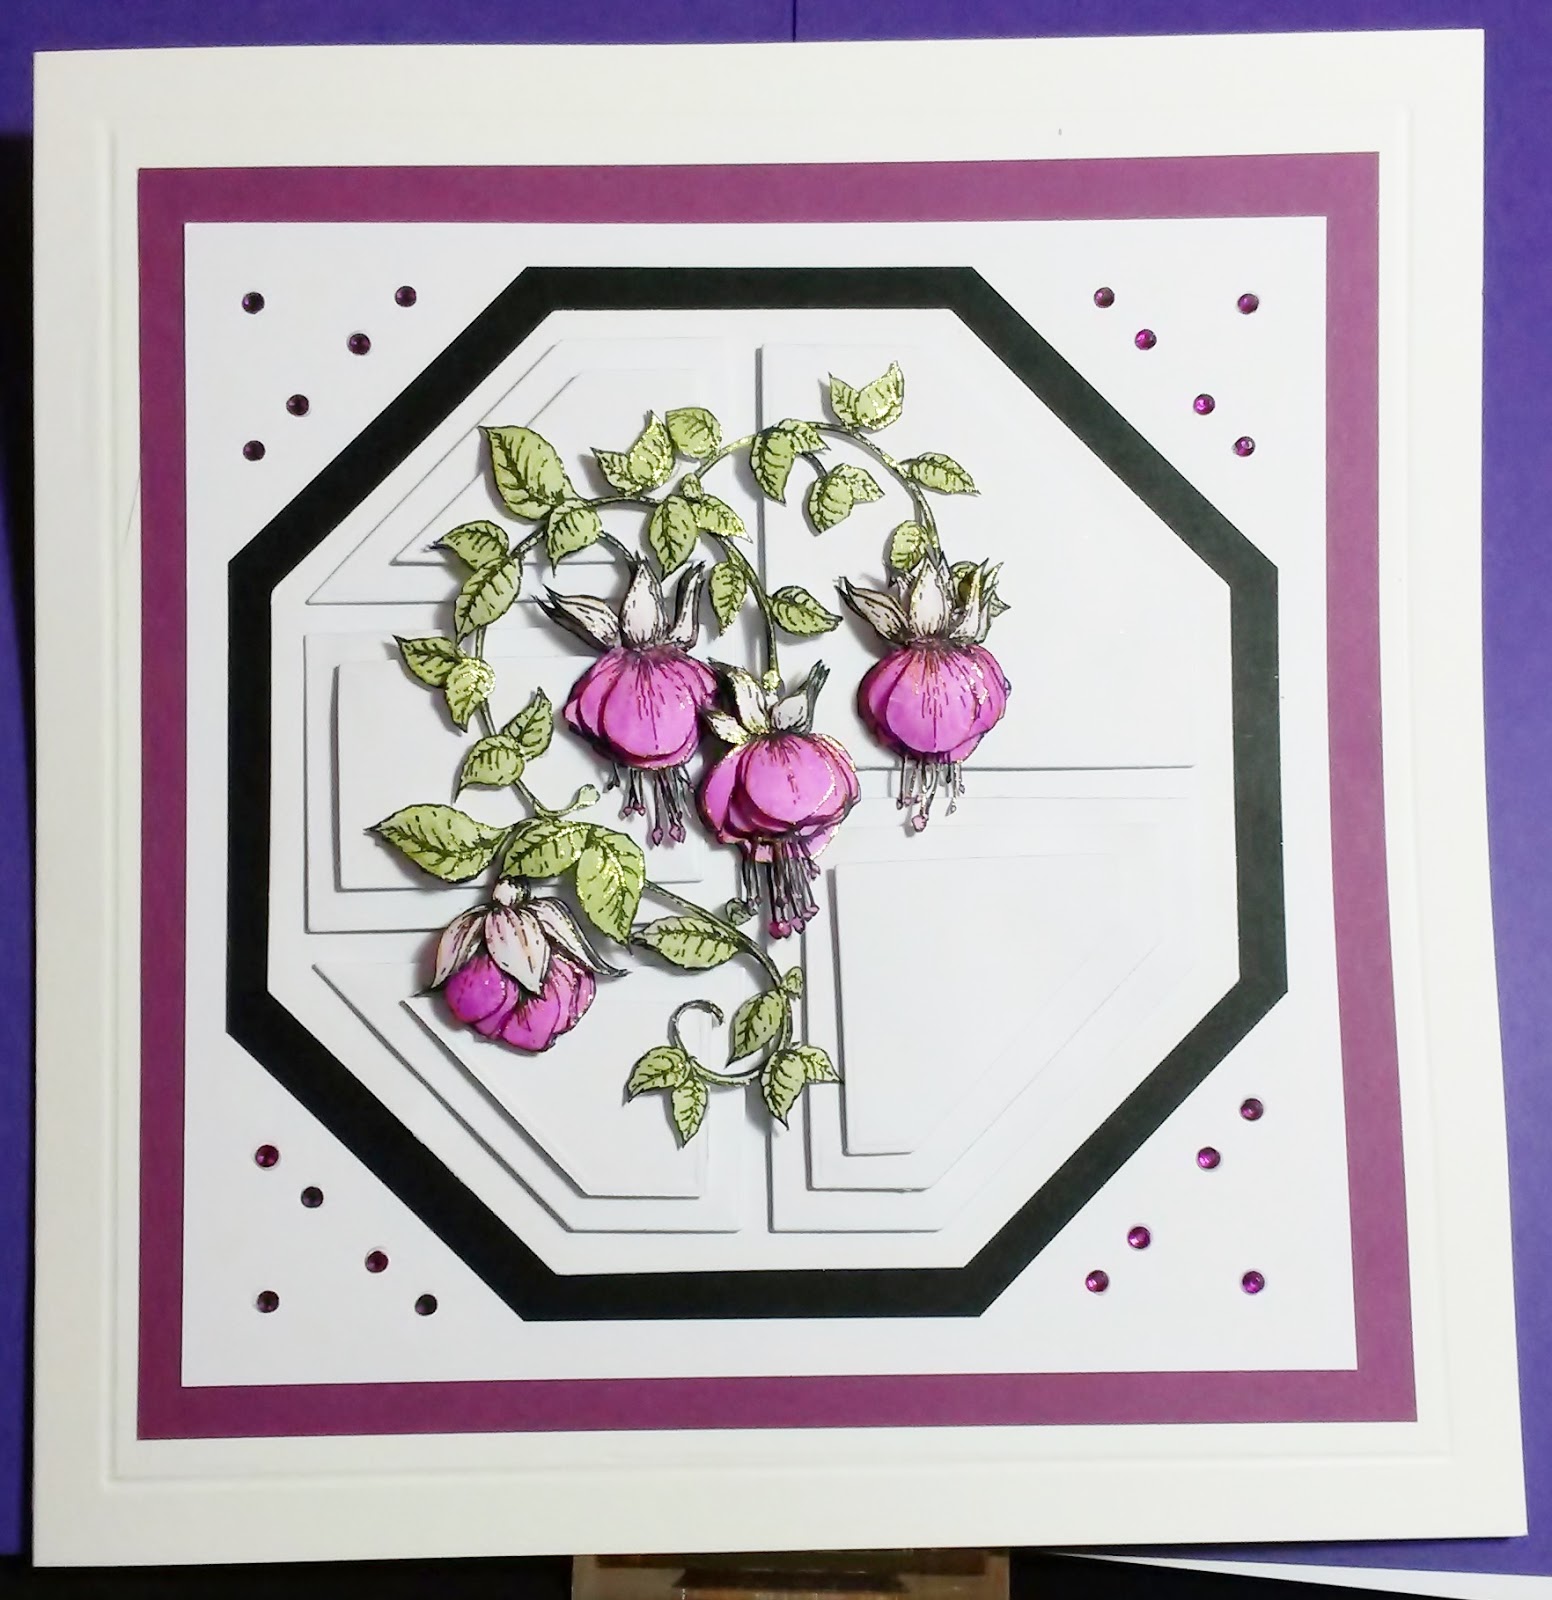
.....and finally I have used the Heartfelt Creations "Fuchsia Clusters" stamp..... so beautiful and using the lovely Crealies Octagon Die .....


Well there you are all my samples for this time but believe me I have so many more to do so keep watching and I'll be back soon
 
I off tomorrow for a Crafty Retreat at Clarity Stamps with my crafty mates Martine, Janet and Doreen and I'm really looking forward to it..... Wish me luck !!!
 
Lots of Love and Big Hugs to you all
xxx
 

Saturday 18 July 2015

My Pencil / Domino Box made at Eileen's Workshop

Hello again

Wow I have I been a busy little Bee lately..... So much to do and so little time to blog but I have a week off work next week and am hoping once I have finished a few things that are coming up I will be able to share what I have been doing.....

Well last Saturday 11th July I went to my friend Eileen's Workshop and boy did we make some stunning Pencil / Domino Boxes..... Below is mine and I can't wait to get my hands on some more of these little boxes as I really enjoyed making it..... But I will add all the Ladies did some super work with theirs too !!!

I used Design By Ryn's Gingko Leaf Stencil..... It really is one of my favourites..... I just adore Trees and Leaves and this has to be one of my favourite Stencils .....

I brayered Black Gesso over my box, front and back, inside and out and did this twice so you couldn't see the wood through the Gesso and allowed it to dry thoroughly..... I then stencilled the Grunge Paste through the stencil and again allowed it to dry..... Once dry I painted with a brush the Black Gesso over it making sure to get in all the little cracks..... Again once dry I used PaperArtsy Fresco Chalk Paints in colours "Tinned Peas and Guacamole" and with my finger I gently stroked the paints over the leaves leaving it quite patchy and then once dry I used Copper and Silver Gilding Wax and gently with my finger stroked and  rubbed the Gilding Wax over in a patchy effect again..... When I was happy with the result I added a little Gilding Wax in Copper around the edges. I felt reasonably happy with the box although I thought it was a little sparse of interest in places so when I got home I added spots of black liquid enamel and then for the lacquered finish I sprayed with Crafters Companion "Spray and Shine"..... Job done.....

I hope you like my box and I think this will take pride of place on my Craft Desk once I have cleared all my bits and bobs and rehomed them back where they belong..... What a task I have ahead !!!

I am showing you lots of photo's as boy did I have a job photographing it.... I tried photo'ing it in the Lounge with and without a Spot Light..... in the Kitchen, in the Garden and on the top of my Car and then at work but really none of the photo's do it justice but never mind at least you get the gist of what it looks like !!!

Take care and will be back soon, promise
Lots of Love xxx


Thursday 2 July 2015

New Lavinia Stamps Challenge Starts Today - #7 " Flowers " .....

Hi All

A new Lavinia Stamps Challenge Starts Today - " Flowers" !!!

Wow..... It's July already and that means the start of a new Challenge from Lavinia Stamps and this month it's " Flowers " and did I enjoy making these cards to give you inspiration to create your own....

So come on get crafting and create that winning masterpiece and you could be the winner of a Voucher worth a WHOPPING £40 to spend in the Lavinia Stamps Web shop.......
Please visit our Lavinia Stamps Challenge Blog and see the super inspiration from the Design Team and get crafting !!!

You don't need a Blog. We accept Email Entries too..... So go onto the Lavinia Stamps web page and all the links are there for you to enter the Challenge. So Good Luck and here's mine for this month
 
My DT projects features the following stamps......
 
Card 1..... I used the beautiful "Floral Spray" Stamp. I stamped this a number of times, painted it and then cut them out and then I turned one of the Flower Spray around and voila a flower was born. I repeated this three times and then stuck them onto a Distress Inked background that I made and I added another Lavinia Stamp called Background Script and I just adore this so much.....


Card 2 ..... I used one of the small Zen Flower Pack Stamps which I stamped loads and loads of times and painted them using the Aquamarkers..... I used the Lavender stamp in the background with various shades of yellow, orange and red to give a perspective of distance.... I then layered the Zen Flowers into sprays of gorgeous flowers and added a few Bees to complete the finishing look.....


Card 3 .... For this I used the very pretty "Lilly" Stamp and stamped this 5 times along the card at various heights and then I painted them and added some white hi-lights and dots for interest..... I also added the "Weaving Ivy" for some interest in the sky..... I thought it was a little bare so I then went and added the decoupage of the pretty fairy "Melodie" stamp which I think made all the difference to the card.....


Anyway I really hope these have inspired you to have a go yourself..... I do hope so as then I would have done what I set out to do.....

I'll be back soon with more things to share with you.

Thanks for strolling over to my Blog today.
Marianne, Lavinia Stamps DT Member xxx